
We are so excited to be expanding our little backyard “farm”!! For a solid 3 years, I’ve read, thought, prayed, researched, and dreamt of owning chickens. The time has not been right in our lives until recently. I see now why previous years would not have been good. To take a venture like this, the entire family has to be all in and ready to take on the work involved. I can honestly say that we are ALL ready!
A Golden Afternoon Farm is ready.
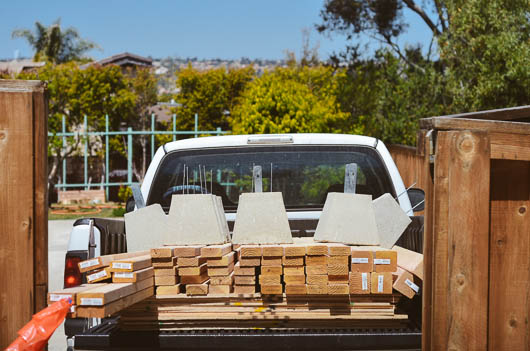
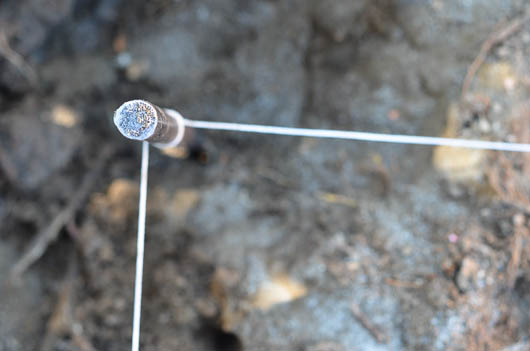
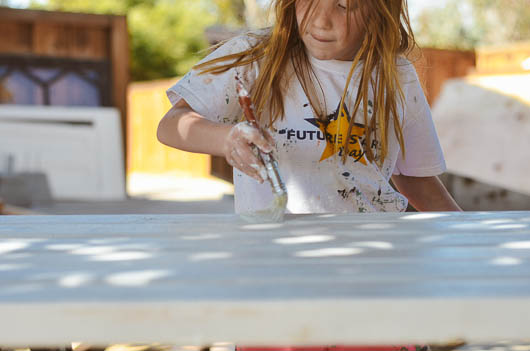
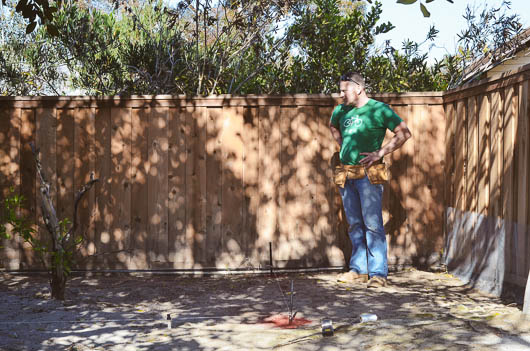
My husband has bravely taken on the task of building us a rather large chicken coop. Right now, we are planning on having 15 chickens. Sound like a lot? Well, we use 5 dozen eggs a week for all of our breakfast, baking, and other food needs. That’s what happens when you cook from scratch, I guess. Plus, we’d like to be able to share some with our friends and family (get ready Erik and El!). He’s never build a chicken coop, but he has all of the spirit he needs to carry him through! He is proving that if you want to do something enough, you can learn your way through the hard parts. I’m really proud of him. We have been married almost 10 years and he’s still making my dreams come true. Who knew a chicken coop could be such an amazing and unexpected display of affection?
I’ll keep you posted on our progress and share how he built it after it’s finished! We don’t have chicks lined up yet but I really felt strongly about finishing the coop before getting the chicks to make everything smooth and stress-free.
NOW, any seasoned chicken farmers please leave as much advice as you can in the comments! I want to know what you did right and also what you would have done differently. For the organic farmers…what you feed your chickens (every organic feed I see is loaded with corn!).
Favorite this and that…
tricks of the trade…
Please share!
Stick around and find us on:
F a c e b o o k // T w i t t e r // P i n t e r e s t // I n s t a g r a m // E m a i l

Last year after Christmas, I told myself to find something simple yet wonderful to make for my friends the next year. I get caught up in so many projects and commitments, sometimes I end up leaving less room for the fun handmade Christmas presents I love so much. My schedule has changed a lot the last two Christmas seasons with my attention turning towards homeschooling. I am enjoying this school year so much but when vacations comes around, I am in much need of rest and time to finish projects…and go to seemingly endless rehearsals and performances for the Nutcracker. I wanted a gift that would be easy, fun, inexpensive (although, good friends are always deserving of the best!), and beautiful.
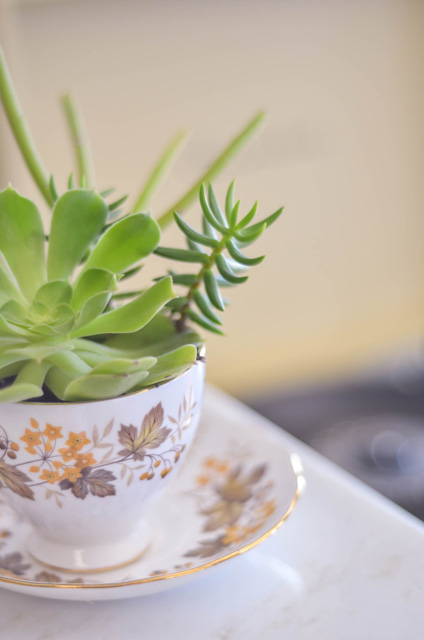
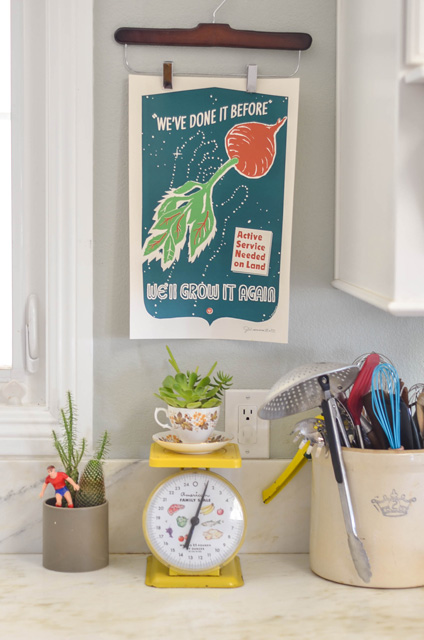
I feel really good about these succulent planters.
Succulents are perfect for everyone because they look great and SUPER EASY to take care of as they need minimal care and water once established. Perfect for friends, your mother-in-law or mom, the neighbors, or the UPS driver.
I started looking around estate sales and thrift stores for good English china to plant succulents in a few months ago. I noticed that the Japanese and Chinese tea cups were always more. How nice that the one I was looking for was actually less. Yay, for me! I got mine ranging from $.25 to $6. If I was in love with the cup, I would buy it for $6, but usually not. You could buy new ones as well. A special monogram mug from Anthropologie is always a good idea for $8.
Required materials:
tea cup
glue
soil
succulents
Basically, I took the teacup, glued the bottom of the cup to the saucer (optional), filled it with soil, and added succulent clippings. They survive for long periods of time with limited water, but make sure to keep the soil moist while they are developing roots. If you have time, place the clippings in water, wait for the roots to form, then add them to the soil. I’ve been propagating them for a few months now from my own yard. It would be super easy for you to find a neighbor with overgrown neighborhoods (think retro 70’s neighborhoods where they will be prevalent, like mine). I saw some down the street from me and will definitely ask them in the future since it’s a variety I don’t have.
That means they’d be FREE!
If you liked what you see, stick around and find me on:
F a c e b o o k // T w i t t e r // P i n t e r e s t // I n s t a g r a m // E m a i l

Isn’t it great how some of the most enjoyable foods are the simplest? A scrumptious garden tomato with a simple sprinkling of salt is a delicious gift.
So simple.
I made my case for peaches being one of the greatest foods of summer, but tomatoes are right up there too. The kids and I had an opportunity this past weekend to pick at a local farm here in San Diego, Suzie’s Farm. We’ve done many farm tours there for school and we love being able to pick baskets and baskets of produce goodness. The Best. When summer fruits and veggies are at their peak, very little needs to be done to improve upon them. God created a tomato or a pepper to go from incredibly sour and inedible, to juicy and sweet in just a few days, thanks to that glorious summer sun.
What a fantastic overseer and gardener God is.
Thank you, God, for tomatoes.

I think gazpacho is a such an amazing soup. It actually existed way way back in the deep dark corners of the history books. Maybe it’s just my love of history, but I think it’s pretty cool to eat something like they did in Rome long ago, don’t you think? It was created to both enjoy the produce of summer but also to eat on a hot day. Quite simply, it is a tomato-based soup served chilled. All of the ingredients are thrown into the blender, so no cooking over the stove or turning on the oven for this recipe! The pickled onions add a little tang and the parsley oil adds some fun flavor and color.
Ok, let’s blend…

Toss all of the gazpacho ingredients in the blender. Puree for a few minutes or until completely smooth. Season to your liking.
Pour into bowls.
Done.

I find arranging buffet style toppings for meals encourages kids to create their own meals and eventually try things which would normally cause them to freak out. Having a small level of control even helps mine to branch out and try new things.
Above, I have hard-boiled eggs, pickled red onions, parsley oil (see below), bruschetta, goat cheese, cucumber, and avocado. If you had shrimp or crab available, that would be fantastic too!

I also served ours with bread since it is an automatic comfort to my kids when they are eating something with a texture like a soup. Gazpacho or even tomato soup are delicious with torn pieces of bread in them.
Enjoy!

Tomato Gazpacho with Pickled Onions and Parsley Oil
For the gazpacho:
6 regular size tomatoes, preferably heirloom
1 large avocado
1 sweet pepper, any color
1 regular size cucumber, peeled and diced
1/2 red onion, chopped
1/4 c. extra virgin olive oil
2 T. apple cider vinegar
1/2 tsp. paprika
1-2 cloves of garlic
salt and pepper, to taste
For the toppings:
pickled onions
avocado, chopped
hard-boiled egg, chopped
fresh bruschetta (chopped tomatoes, dash of olive oil, garlic, salt)
goat cheese, crumbled
cucumber, peeled and chopped
Parsley Oil:
1 c. of fresh parsley
1/3 c. extra virgin olive oil
salt, to taste
Blanch the parsley for 1 minute in boiling water. Strain and blend with the olive oil in a blender. Serve, salt, and refrigerate.
Add all of the gazpacho ingredients in a blender and puree until smooth. Season to your liking. Add the toppings and enjoy!
Stick around and find us on:
F a c e b o o k // T w i t t e r // P i n t e r e s t // I n s t a g r a m // E m a i l
 Sweet Summer. Sweet Summer.
I love you for your refreshing breezes.
Your warmth brings new life to my very favorite foods.
Berries are one of your specialties.
You do them WELL.
We are enjoying our summer days. We’ve had a few changes around here. A few weeks ago we got our very first foster care placement. It’s true!! We’ve been so thrilled to share our home and arms with a cute little snuggle-bug again. It’s been so strange to care for a newborn having NOT just given birth and NOT breastfeeding. I tell you, those two things make a world of difference! I still wake up several times a night, but I am not nearly as fatigued as I was after giving birth, while also not having the ability to walk. For those who have asked, we don’t know how long this sweet baby will be with us, but we will give her all the love we can until she goes to be with her forever family.
I am so excited to be able to do what, I believe, God intended for us all to do. There are so many kiddos in need of our love. Sometimes, we get busy with our jobs and appointments and forget about those in need of our compassion. As a wife and mother, I have made a specific choice to stay home and care for my kids. Thankfully, this also means I am able to bring other little ones into our home along the way, be they friend’s kids or strangers. I love that. Kids get shuffled around a lot these days so they need a little love. Sometimes my job is difficult, but I am SURE I am doing what God wants me to be doing right now and for that I am EXTREMELY thankful.
This IS my job.
This is my privilege.
My heart is full.
“When the Son of Man comes in his glory, and all the angels with him, then he will sit on his glorious throne. Before him will be gathered all the nations, and he will separate people one from another as a shepherd separates the sheep from the goats. And he will place the sheep on his right, but the goats on the left. Then the King will say to those on his right, ‘Come, you who are blessed by my Father, inherit the kingdom prepared for you from the foundation of the world. For I was hungry and you gave me food, I was thirsty and you gave me drink, I was a stranger and you welcomed me, I was naked and you clothed me, I was sick and you visited me, I was in prison and you came to me.’ Then the righteous will answer him, saying, ‘Lord, when did we see you hungry and feed you, or thirsty and give you drink? And when did we see you a stranger and welcome you, or naked and clothe you? And when did we see you sick or in prison and visit you?’ And the King will answer them, ‘Truly, I say to you, as you did it to one of the least of these my brothers, you did it to me.’ “
(Matthew 25: 31-40)
If you are interested in adopting a sweet child like this one, contact an agency like the one we do foster care with. They work with adoptive families nationwide for domestic as well as international adoption. Check them out!


It’s the last day of school.
Let me say that again.
IT’S THE LAST DAY OF SCHOOL!!
While I love EVERY bit of teaching my kids, every teacher needs a break at some point, right?

It’s summertime. Can you believe it?
Here in San Diego, God has been showering my garden with sunshine-y goodness and I’ve been soaking it all in. I am so thankful to have a few sweet little strawberry patches, a large boysenberry ‘wall’, and a few blueberry and golden raspberry plants to round out our little backyard homestead of berries. I have learned so much about gardening the past several years. The more plants I grow, the more I want other people to experience the thrill of seeing God’s amazing creation, growing before their eyes. If you’ve been thinking of gardening in even a small part of your yard, check these out:
“The Backyard Homestead” and “The Urban Homestead”
These books make it super easy to find a growing style that works for you and your size of yard. Like any process, gardening is about organization and planning. The seeds pretty much cooperate with any conditions as long as they have sun, water, and food (by way of awesome soil). It’s easier than you think!
Summertime means jam to me and LOTS of it. One of my favorite smells on the entire planet is that of strawberry jam cooking on a slow summer day. There is usually music playing and I try to have friends around whenever possible. Friends make the time pass by quickly and they usually get to take some of the goods home!
Jam is also a great thing to share with…well…anyone. It can be a hostess gift, thank you present, get-well gesture, teacher’s gift, or can be shared with those neighbors you’ve been meaning to introduce yourself to for the last year.
Here’s how I make my lavender strawberry jam…


Lavender Strawberry Jam
(sources: many different recipes combined over many years of good and bad jam)
1 1/2 c. sugar
2 tsp. Pomona’s Universal Pectin (found online or at natural food stores like Whole Foods)
8 cups strawberries, hulled and cleaned
2 tsp. calcium water (from the Pomona’s box)
1/2 c. lemon juice, fresh squeezed
3 tsp. dried lavender blossoms, chopped
1. Start by boiling some water in a large pot for sterilizing your jam jars, if you’re using them. Place another pot on the stove for your lids. When the water is boiled, you will add as much water as needed to cover the lids and rings. They are sterilized separately because placing them in boiling water can melt the rubber on the lid, which is needed to seal the jar.
2. Mix the sugar and pectin in a bowl and set aside for later.
3. Crush the strawberries until you are happy with them. I like mine with a few chunks so squish yours a lot if you prefer your jam smoother. This is a GREAT thing to have kids help with. They love it!
4. Bring the strawberries to a boil, then add the lemon juice and calcium water.
5. Gradually stir the pectin and sugar mixture in with the strawberries, until combined. Add the dried lavender. Return to a boil and stir frequently so it doesn’t burn.
7. While it’s returning to a boil, lay out 1 towel for your hot jars to lay on and 1 towel for the completed jars to sit on.
8. Skim the foam, if it is present (trust me, you have to do this or it will leave a funky looking white layer on the top of your jam which resembles mold. I may or may not know that from experience). Remove sterilized jars from the water with tongs and place them on the towel. Keep water boiling.
9. Carefully fill the jars until there is a 1/4 space between the jam and the top (that space is called ‘headspace’ in the jam world :)). Wipe around the rim of the glass with a clean rag or paper towel. Use the tongs to place the lid on top and then used your fingers to screw the outer rings on. Not too tight, just finger tight.
10. Place the filled jars back in the boiling water for 10 minutes. Remove and place on the towel. In an hour, tap the lids to make sure they are tight and don’t press in. If the lids do pop in and out, then immediately place those jars in the fridge. They are still good to eat. Let the others sit still for a day and then they are ready to hand out to friends and family or store away for the winter!
For some cute canning jar labels check out the link below:

Stick around and find us on:
F a c e b o o k // T w i t t e r // P i n t e r e s t // I n s t a g r a m // E m a i l
Page 2 of 7«12345...»Last »
|
|


