This post should be titled “I Love Heirlooms and Heather Ross” but that would only make sense to me and that’s of no help to you guys. It is a true statement though and the beginning of the story to these shorts.
I have a box of lace that was collected by my Grandma and passed on to me. Sometimes with heirlooms, I tend to hold on to them without putting them to use because often making use of them involves altering them drastically. I always question whether the person would have wanted their items the same or if they even would even care at all. I also treat my Heather Ross fabric the same way. Her fabric is my favorite and some pieces I had to hunt and barter for so they are like gold to me. Having these items sit in my closet isn’t any good either so I knew I needed to stop hoarding and just MAKE! I’m such an over-analyzer which is why I had to quit scrap-booking…too many choices.
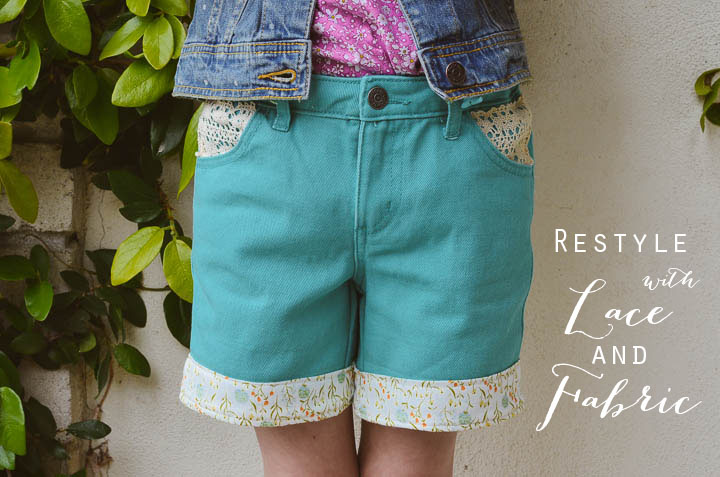
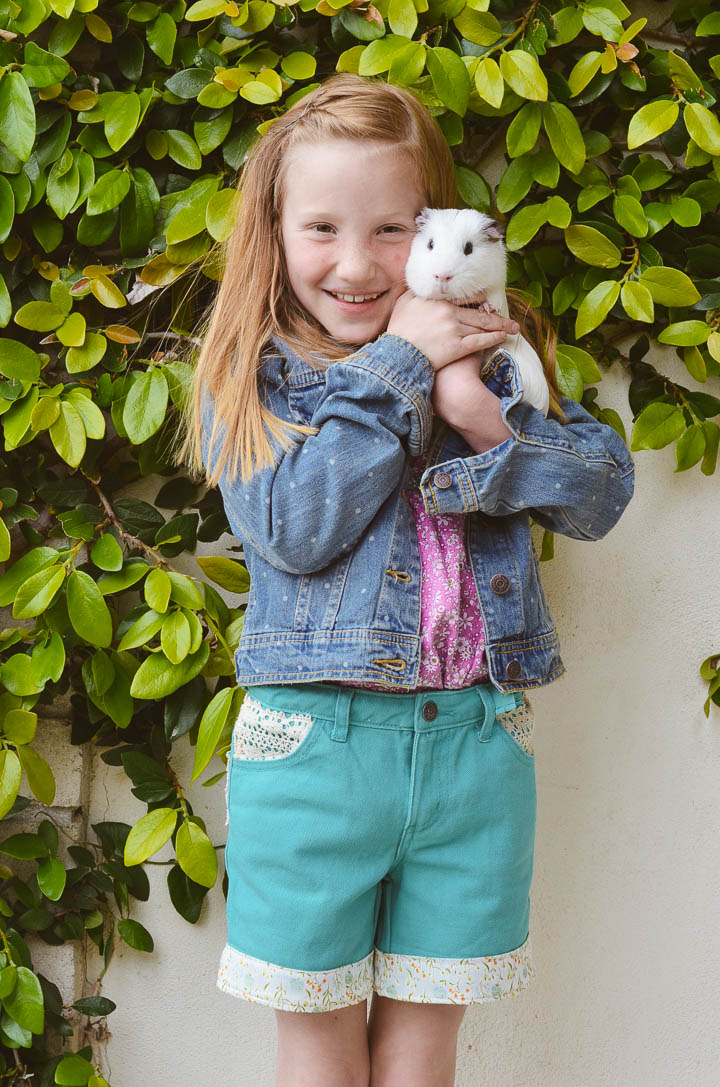
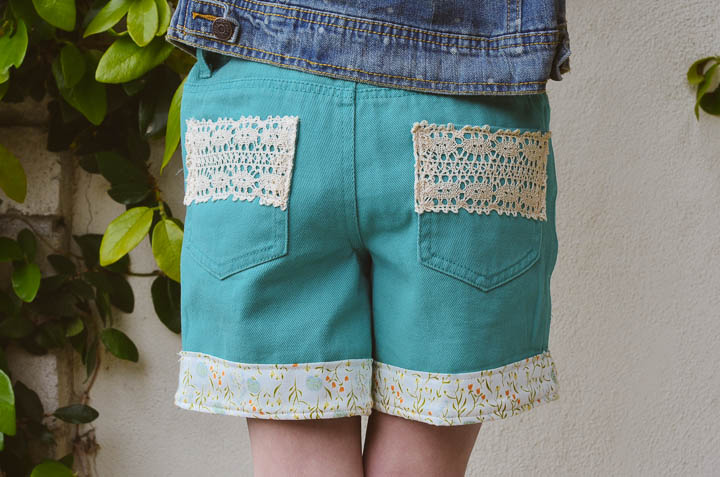
So, I saw these kids shorts at Target which were a lovely shade of turquoise-y/teal, but they were too short for my comfort on a little girl. Call me old-fashioned but I don’t dig the cheek hanging out of the shorts look. Ok, these weren’t that short but still…what’s up with those teenagers? I decided to add some fabric to the ends and lo and behold, the Heather Ross wildflower fabric from her first Far Far and Away line was PERFECTION. I’ve had this fabric since the day it came out and I’m so glad I cut into it. Next, I added lace to the front and back pockets, hoping that this will encourage my dress-wearing girl to adopt some shorts into her wardrobe!
For the fabric cuff:
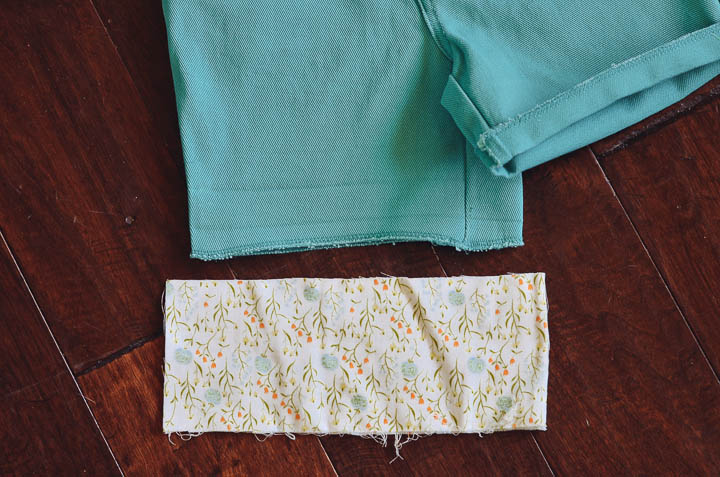
1. Undo the current cuff with your seam ripper and unroll the shorts completely. Turn the shorts inside-out.
2. Cut a piece of fabric that is 1/2 inch longer on each side than your un-cuffed short bottoms and 4 inches high. You will need 4 total, 2 for each front and 2 for each back cuff.
3. Iron the WRONG sides of each fabric piece together, matching the salvaged edges. Iron the un-cuffed short bottoms.
4. Match the edges of one front piece to the top and one back piece to the bottom of the shorts. Pin.
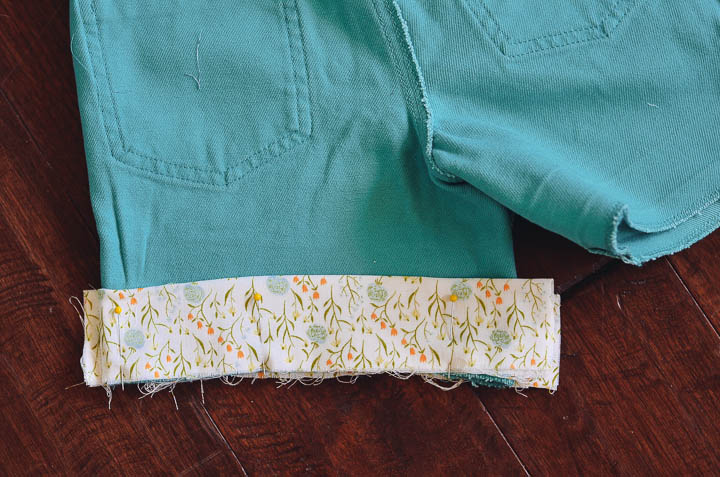
5. Sew along the sides of each fabric panel, just outside where it meets the shorts with a 3/8 in seam allowance.
6. Sew the fabric to the bottom of the shorts all the way around leaving a 3/8 in. seam allowance. Go over the thicker parts twice.
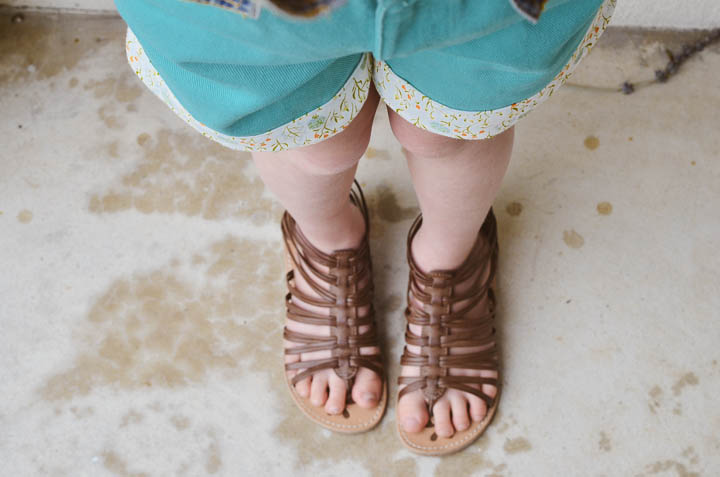
7. Repeat with the other cuff and turn the shorts right-side out again. Bring the newly sewn fabric cuff around to the front.
8. You can sew the inside and outside edges of the cuff to the main body of the shorts or simply sew the cuff to the shorts all the way around 1/4 in from the top, so it doesn’t flip up and down all the time. I prefer the latter because I do NOT want to iron kids shorts!!
You’re done with the cuffs and you can totally stop there if you want!
or you can add lace to the pockets…
For the lace pockets:
Simply cut a piece of lace 1/2 in. longer than each side of the back pockets. A lace piece that is long and finished along its edges works perfectly. Line the lace up with the top of the pocket and tuck each 1/2 in. under on each side. Pin and sew around each side of the lace, going over it a second time because lace has many holes.
For the front pockets, find a piece of lace that can tuck inside the pocket. Tuck under and pin any of the salvaged sides of lace that are sticking out. You might have to wrangle this pocket a bit, but you only need to get in there and get that sewing done. It doesn’t need to be fancy because the lace is very forgiving and doesn’t show mistakes like normal fabric.
Now, you’re REALLY done!! If you restyle some shorts be sure to link up below!!
Stick around and find us on:
F a c e b o o k // T w i t t e r // P i n t e r e s t // I n s t a g r a m // E m a i l


Oh. my.
I am melting.
He has his daddy’s curls and dimple. That’s the same dimpled smile that made my fall in love with his daddy.
This little guy, Dean, is the youngest of my 3. When you’re the youngest, you often get the hand-me-downs and the cats-offs. I wanted to make this guy something special that was brand spankin’ new. I’ve had Liesl Gibson‘s book, Oliver + S: Little Things to Sew, since it first came out last Spring. The week after I got it, I cut this explorer vest out and quickly got distracted by my kid’s birthday parties and then other crazy projects. A few weeks ago, I got the pattern back out again and was determined to get it done. Sometimes patterns can seem like they will take more time than you might have (true in a LOT of cases which is why I don’t use them a much), but this one took me only a few hours. I did a little bit over 2 nights. If you are a lazy iron-er (*raising my hand*), you will have to suck it up for this project. The iron makes or breaks this vest and if you leave it out you risk the sometimes feared “Did you make that?” question from strangers. Nobody wants that.
For my fabric, I chose a kind of linen blend for the exterior which i got from one of my favorite fabric resources, Hart’s Fabric. It is a heavier fabric and will hopefully wear well for a 3 year-old boy. For the lining and the exterior pockets, I chose one of my very favorite fabrics from Heather Ross. I spent way too much a wee bit of money for this camper fabric a few years ago, as it was out of print, and I’ve been hoarding it ever since. I’m learning that I’d much rather see my favorite fabrics floating around on things I’ll see every day that will be well-loved, than just stare at them in my fabric stash.


Putting it to good use already. That’s all a mother could ask for.
 
Make a dress for a night out? Yes! I finally did!
I love to make little girl’s dresses. It’s very satisfying work. It helps that my sweet girl seems to appreciate it immensely, but I would still do it anyway. I have cut out soooo many patterns for dresses for myself, but I have a hard time making up my mind since it’s such a larger scale that a little girl’s dress (1 yard vs. 3 yards). I’ve made clothes for myself…a few skirts here and there and a few lame shirts. I’ve worn them around the house but I’m such a perfectionist, I was always afraid of the dreaded, “Did you make that yourself?” question. The question swirls around in my head and comes out more like, “Did you attempt to patch some fabric together and wrap it around your body in order to form a piece of clothing?” I’m sure people mean well, but I would prefer my clothes to NOT look homemade.
Is that so very wrong?
So, I found this sweet and super-easy way of making a dress from the always lovely and always inspiring Anna Maria. I saw it like a year and a half ago and knew it was going to be perfect and it only took me that long to actually make it. At least I finally did, right? You can find the sewing instructions on her blog here and be sure to poke around a bit because there is a lot for a creative sponge to soak up.
The pattern was easy to so because it was made from 4 panels of fabric which are the same size. Craziness! It has such a pretty drape considering that. The waist is sewn with elastic thread which is covered by my belt in these pictures. I HIGHLY recommend this pattern. You will not be disappointed.

I found this fabric from Hart’s fabric ( my favorite fabric website). I knew I loved it right away and I didn’t care if anyone else did. I love that feeling. This fabric was waiting for this dress pattern. I know that now.

My husband loves a good side-ways picture. A weirdo, but I love him so.

Dress: made it! / shoes: Nordstrom (matching with my friend :)) / belt: Anthro / necklace: Banana Republic outlet (’09)
Anyone else want to make one?
It’s perfect for a night out…
Linking with Mandy at Harper’s Happenings

and with Emily


Back in November, some friends and I got to participate in Project 15 of Craft Hope. I totally forgot to post the finished pictures until someone asked about them the other day. I have to give my friends great credit for joining in one of my crazy projects. Whether they had sewn before or not, these ladies agreed to make a sock monkey none of us had made before and then give it away to someone who had just had their house burned down in Texas.
I have cool friends.
For those of you who don’t know Craft Hope (and Jade who runs it, it is a WONDERFUL organization that reaches out to different suffering areas of the world through handmade projects. It might be a natural disaster or burn victims, but they are all people in need and have had their world tipped upside-down. Each project is directed at a certain need, this last project being sock monkeys for victims of the crazy fires in Texas last year.
Check the site today for a new project! We’ve all been on the edge of our seats waiting for this announcement!
It’s funny how helping can be so fun, isn’t it?

Melissa, Me, Diane, Jessica, Jennifer, and Leah (who missed the group photo. sorry :/)
We worked from 7 until midnight, but only finished parts. Actually, Melissa finished hers (Yahh!). Mostly, we laughed a lot and drank wine which is always a good time. We followed this tutorial which has great step-by-step photos.
A big thanks to my sister for helping to finish eyeballs, ears, noses, and mouths during Thanksgiving to get ‘er done! :)

Our box at its first destination. It’s the one with the blue polka-dots and the sock monkey on the front.
(picture from crafthope.com)

The whole 300+ sock monkeys ready to go into loving arms! It’s SO great to have been a part of that!
(picture from crafthope.com)

Craziness! It’s already been a year!
The official time I started my blog was actually back in August of 2010, but I wanted to get things just right on the design end before posting. It’s kind-of a joke when I think of it now because it was FAR from nice and my posts were pretty sad-looking. I knew they were not awesome, but you have to start somewhere, right? I did like my first real banner above, though. I kind-of miss it.
Speaking of design, how do you like my new comfy space? I wanted to go back to my roots with a wood background (my very first wordpress website had a dark wood background) and just step it up a bit. I think it’s pretty cozy. Special thanks to Jay Woolwine for installing the parts I couldn’t and to Erik Weston Homestead for listening to my blubbering about colors, banners, and whether there should be lines separating other lines and other very important details.
1. Be sure to check out the categories to our right which will link you to pages with visual links to all my posts. —————>>>>
It’s SO much easier to use. Yes, it took me a LOOOONG time. If you like it, please let me know. If you don’t like it, keep it to yourself :).
2. <<<<————–I also have a cute new scrabble social bar which you can use to share my page after you read this :).
3. ^^^^Above is my new banner which is hopefully reflecting my handmade style. ^^^^
It’s been a great year for this little space. I started my first month of viewers with just a few of my closest buddies and some obliging family members. Now, I am astonished at grateful at having over 15,000 people visiting in just a single month!! Wow, people! There must be something just a teeny tiny bit likeable goin’ on here.
*blush*
My second year will hopefully bring even better things. A few cool things to come are some useful printables in the name of Valentine’s Day, some embroidery hoop projects and a hoop swap, cool thrifted products remade, some exciting kid’s room redecorating with help from here, a revamped garden with new techniques, things I’ve never canned before are going in those cans, working on a dress for myself, and I’m dragging my friends here to do some of this stuff with me! Sound good?
In honor of this special day, I am sharing a cupcake with you all. Yeah, I kinda thought you would like it too. My sister actually made these back in April for my Miss F’s birthday I just totally forgot to post them. I guess it was meant to be. I saw them on Pinterest and asked my sister to make them and since she’s awesome, she said yes.

Cuties.

I used my neighbor’s freshly cut olive wood firewood for their little perching area.

Thanks for your support and for hanging out with me in this little space.
The community here means a LOT to me.
Thank You, friends!
|
|


