Make: A Succulent Teacup Planter

succulentteacup


Last year after Christmas, I told myself to find something simple yet wonderful to make for my friends the next year.  I get caught up in so many projects and commitments, sometimes I end up leaving less room for the fun handmade Christmas presents I love so much.  My schedule has changed a lot the last two Christmas seasons with my attention turning towards homeschooling.  I am enjoying this school year so much but when vacations comes around, I am in much need of rest and time to finish projects…and go to seemingly endless rehearsals and performances for the Nutcracker.  I wanted a gift that would be easy, fun, inexpensive (although, good friends are always deserving of the best!), and beautiful.

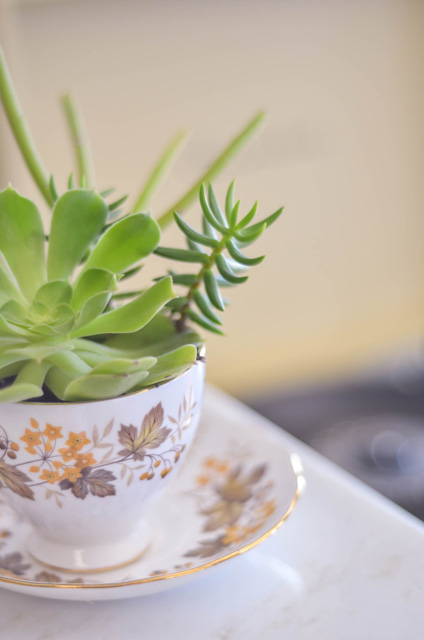
I feel really good about these succulent planters.

Succulents are perfect for everyone because they look great and SUPER EASY to take care of as they need minimal care and water once established. Perfect for friends, your mother-in-law or mom,  the neighbors, or the UPS driver.

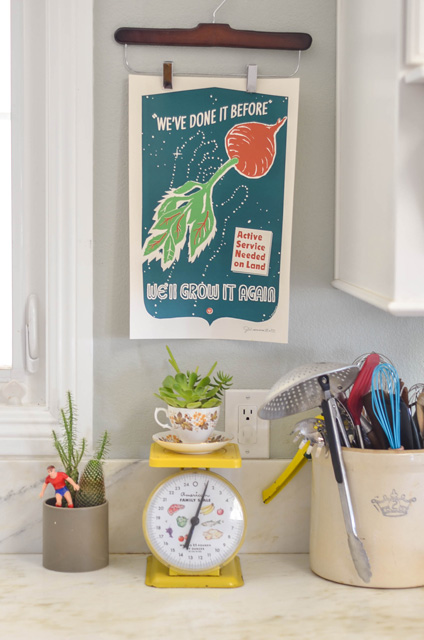
I started looking around estate sales and thrift stores for good English china to plant succulents in a few months ago.  I noticed that the Japanese and Chinese tea cups were always more.  How nice that the one I was looking for was actually less.  Yay, for me!  I got mine ranging from $.25 to $6.  If I was in love with the cup, I would buy it for $6, but usually not.  You could buy new ones as well.  A special monogram mug from Anthropologie is always a good idea for $8.

DSC_89901

Required materials:

tea cup

glue

soil

succulents

Basically, I took the teacup, glued the bottom of the cup to the saucer (optional), filled it with soil, and added succulent clippings.  They survive for long periods of time with limited water, but make sure to keep the soil moist while they are developing roots.  If you have time, place the clippings in water, wait for the roots to form, then add them to the soil.  I’ve been propagating them for a few months now from my own yard.  It would be super easy for you to find a neighbor with overgrown neighborhoods (think retro 70’s neighborhoods where they will be prevalent, like mine).  I saw some down the street from me and will definitely ask them in the future since it’s a variety I don’t have.

That means they’d be FREE!

DSC_90091

If you liked what you see, stick around and find me on:

F a c e b o o k  //  T w i t t e r  //  P i n t e r e s t  //  I n s t a g r a m  //  E m a i l


Christmas Cookies: Chocolate Crackles

DSC_03391
Do you have questions that you get asked a lot?  Like if your hair color is real or if “all of those kids are yours”?  I get asked both of those questions a lot, but not quite as much as I get asked:
“How do you cook so much with your kids?”
My first reaction is to say, I dunno…well…I just do.  However, I’ve been thinking about it for a while and I realized there might be more to it than that.  I just haven’t really thought about it.  I try to be (and often fail at being) deliberate when it comes to letting the kids help.  I’ve learned to say yes when they ask to help and know ahead of time that there will be an extra mess when they do. Sometimes I’m excited about the help and sometimes I’m in a hurry and get snappy, but I still TRY.
I know other people REALLY REALLY want to cook more with their kiddos, so I thought I’d share how we have gone about it in a way that works for us.  Who knows?  Maybe your kids will be able to make breakfast for everyone in your family this week? :)
I asked my daughter Faith (7) if she would help me show other kids how to bake something.  She giggled and said “of course”.  This last year I have let her make more meals over the stove on her own so that she will be hopefully be self-sufficient by the time she’s an adult and then will be able to make yummy meals for her husband and family.  Hopefully.  When she started cooking when she was a wee one, she most definitely made mistakes, but how else is a kid to learn, right?
When Faith was little, I started cooking “lessons” with spreading peanut butter, grating cheese, washing vegetables,  mashing potatoes, whisking eggs, and rolling cookie dough.  Those can really be started around age 2 or 3, they will just be messy versions of the expected result…which is totally fine.  I am a perfectionist, to a fault, so I have had to work on setting reasonable expectations.
Once kids are old enough to use the stove, there is a world of possibilities!  Everyone really has to decide for themselves what age is best for this.
This Christmas, Faith made her first batch of Christmas cookies, following the recipe.  The exciting thing is, if we give our kiddos the tools they need to cook…they totally can!  If you don’t know how to cook or don’t like to, consider getting your little ones on the path to having those skills.  Remember their wives and husbands they will be feeding and even you later in life!  Letting them follow a recipe is an easy way to find out how much they actually have let soak in.
I’ve narrowed down some teachable moments:
  • K I T C H E N   S A F E T Y:  washing hands, not licking fingers, proper use of knives, hot things, etc.
  • Operating the oven and finding the correct temperature.
  • Talking about what degrees are.
  • Why we preheat.
  • Identifying measuring cup sizes and also the different measuring cup used for liquids.
  • What the abbreviation is for a cup.
  • Measuring using a recipe.
  • That there are 4 quarters/parts to a make a whole.
  • What it means to “pack” something in a measuring cup.
  • Proper use of salt (too much vs. too little and why both are bad).
  • Turning on the stove
  • Finding and using the right amount of heat
  • Stirring to prevent burning
  • Measuring while cooking at the same time
  • Breaking eggs into a bowl before adding them to your recipe to prevent eating egg shells.
  • How to get egg shells out of a bowl of scrambled eggs. :)
  • Telling the difference between a teaspoon and a tablespoon.
  • Learning their abbreviations.
  • That there are 3 teaspoons in 1 tablespoon.
  • Getting a smooth consistency when stirring.
  • Scraping a bowl clean
  • What it means to “level” something.
  • The difference between baking soda and baking powder
  • What it means to “chill” something.
  • Cleaning up after you cook!
(side-note: I didn’t stage this. She was talking about what her Nutcracker performance would be like, then she stopped to daydream!)
  • Rolling cookies
  • Setting a timer
  • How to take things in and out of the oven properly.
Chocolate Crackle Cookies
(family recipe)
1 c. chocolate chips
1 c. brown sugar, packed
1/3 c. canola oil
2 eggs
1 tsp. vanilla
1 c. flour
1 tsp. baking powder
1/4 tsp. salt
1/2 c. chopped walnuts (optional)
1/4 c. powdered sugar (for rolling)
Melt the chocolate in a saucepan.  Remove from the heat and combine it with the brown sugar and oil.  Add eggs one at a time and beat well.  Add vanilla.  Combine flour, baking powder, and salt.  Add to the chocolate mixture.  Stir in nuts, if using.  Chill the dough for 1 hour or up to 3 days.  Pre-heat the oven to 350 degrees.  Roll the dough into balls a little larger than a whole walnut or really as big as you want(just increase the baking time).  Roll them in the powdered sugar.  Place them on a greased cookie sheet or a silpat.  Bake for 10 to 12 minutes.  Cool and enjoy!
Happy little lady with her first solo Christmas cookie baking!

If you liked what you see, stick around and find me on:

F a c e b o o k  //  T w i t t e r  //  P i n t e r e s t  //  I n s t a g r a m  //  E m a i l


West Elm Holiday Entertaining Event

IMG_4193

 I’m so excited to be sharing some great Holiday cocktails at West Elm San Diego!

Thursday, December 13th from 6-8pm

RSVP here.

I will have 3 drinks including one without alcohol for those inclined or even for the kiddos!

I’m so excited to use West Elm’s new TWIG bar-ware!

img29o

Check it out on West Elm’s site here.

Here’s one cocktail I will be serving (recipe here):

cocktailcardfront

The evening will also feature holiday food ideas from BetsyLife and floral ideas from Leaf it to Lexi.

Should be fun!

Hope to see some of you San Diegans there!

I Could Totally Make That: 2012 Version

 Last year, I threw together a group of products that I thought were inspirational for the handmade artist.  Well that list went CA-RAZY last year.  I couldn’t even tell you how many people have stopped by to check that guy out.  I was/am shocked.

I love and purchase from all of the stores that provide these decorations, but sometimes it’s fun to be inspired by them for our own crafting at home, right?  Right.

Here was the 2011 round-up:

I did end up making a Nutcracker last year:

You can find my tutorial here.

I did manage to get a manzanita branch a few weeks ago on a hike so maybe I can pull off the branch candelabra.  That would be awesome.

This year, I thought I’d round-up some new ones for us to play around with.  Who knows?  Some of you might find something to buy while others might run to the craft store to get supplies. It’s fun to look at dreamy holiday decorations either way.

1. Succulent Wreath found on redenvelope.com, $80

 I have seen many tutorials for this kind of wreath, but Martha has a very clear one here that would be easy to follow!

2. Cloth advent bags from landofnod.com, $49

I bought these same bags from amazon earlier this year for PENNIES compared to this price tag.  You can find them here at $6.99 for 25 drawstring bags.  From there, you would only need to apply an iron on transfer for the numbers and you are golden!

3. Charlie Brown Christmas tree from target.com, $14.99

For such a cute tree, that price is not that bad. However, imagine of you could make it for free?  Oh, yes!  If you go to your local Christmas tree farm, chances are they will let you take discarded Christmas tree branches home for FREE.  You could either drill a hole into the base of a tree-stump cast-off and glue a branch into it, or find some scrap wood to make and “x” with and drill a hole through both of those and the bind them together with glue.  Then, you need only find a very inexpensive red ornament and you have a sweet little Charlie Brown Christmas tree.  Be sure to hunt down a piece of light blue cloth for Linus’s blanket while you’re at it.

4. Felt Charger from target.com, $19.99/for 4

I happen to have a few yards of red felt in my craft closet from a project I never completed, but if you don’t have that stashed away, you can find it at any fabric store.  If you add a coupon, you are really in business.  You will most likely have to spray it down with a glue or fabric stiffener so you are not constantly straightening it out.  Ideally, you would be best off using a thicker felt but you’d probably have to order it online and it would be harder to cut.  After you have your felt, download a snowflake image from google images (I go for the copyright free ones) and blow it up to the size you want it to be.  cut out the template, place it over the felt, and cut away!

5. Gilded pine cones from westelm.com, $2

Again, these are a pretty good price, but for $2, you could buy almost a whole can of gold paint and be able to make a LOT of them.  Plus, it’s always fun to collect the memories along with the pine cones and you could even tag them with those memories when you hang them.

6. Woodland Snow Globes from redenvelope.com, $29.95

Snow globes have been very popular the last 2 Christmas seasons.  DIY’s are popping up everywhere!  We all have our favorite techniques and glues to share.  You could totally pull these off with a few bottle-brush trees from the craft store and some jars out of your pantry (after you eat the food in them of course).  Last year I put LEGO guys in our and the boys loved it.  I love the look of these ones.  There are a few different looks which are fun and new (beyond your basic baby food jar), including putting jewelry in the snow globe.  How lovely, right?

7. Branch Christmas tree from anthropologie.com, $

This DIY could be a little trickier but totally worth it.  The tree would require strategic placement of branches starting with a wire base, most likely.  You have to be pruning constantly  but the result could stay in your holiday decor for years to come.

Have you seen any other decorations that have inspired you?

If you liked what you see, stick around and find me on:

F a c e b o o k  //  T w i t t e r  //  P i n t e r e s t  //  I n s t a g r a m  //  E m a i l


Cozy Morning + a Hobbit

“If more of us valued food and cheer and song above hoarded gold, it would be a merrier world.”

J. R. R. Tolkien

“The Hobbit”

If you liked what you see, stick around and find me on:

F a c e b o o k  //  T w i t t e r  //  P i n t e r e s t  //  I n s t a g r a m  //  E m a i l

Page 20 of 50« First...10...1819202122...304050...Last »